

 www.infoupdate.org
 Opening: Why Build a Flat Roof Frame? Flat roofs offer a modern aesthetic and can be a practical choice for certain structures like sheds, garages, or even additions to homes. However, "flat" doesn't actually mean completely level; they require a slight slope for water runoff. This guide will walk you through the process of building a structurally sound and properly sloped flat roof frame.
Step 1: Planning and Preparation Before you even touch a piece of lumber, careful planning is crucial. Measure and Design: Accurately measure the area you want to cover with the roof. Decide on the desired overhang, if any. Create a detailed plan or sketch showing the dimensions, rafter spacing, and slope. Determine the Slope: A typical flat roof slope is 1/4 inch per foot. Calculate the total drop you'll need based on the length of your roof. For example, a 20-foot roof would require a 5-inch drop (20 feet x 0.25 inches/foot = 5 inches). Choose Materials: Select pressure-treated lumber for all components of the roof frame. Common sizes include 2x6, 2x8, or 2x10 rafters, depending on the span and expected snow load. Decide on the sheathing material (plywood or OSB) and roofing material (EPDM rubber, TPO, modified bitumen, etc.). Gather Tools: You'll need a circular saw, measuring tape, level, square, drill, impact driver, safety glasses, work gloves, and a ladder. A chalk line and framing nailer can also be very helpful. Obtain Permits: Check with your local building department to determine if permits are required for your project. Ignoring permitting requirements can lead to fines and delays.
Step 2: Building the Perimeter Frame (Ledger Boards and End Joists) The perimeter frame provides the foundation for the rafters. Install Ledger Board(s): If the roof is attached to an existing structure, install a ledger board along the wall where the roof will connect. The ledger board needs to be securely attached to the studs of the existing wall. Ensure it's level. Account for the Slope: If your ledger board is against an existing building, the top of the ledger will be lower than the opposite side joist of your new roof in order to account for the roof slope. Build the Opposite End Joist: Construct the opposite end joist (or wall) according to your plans. This may be a simple beam sitting on posts, or a full wall assembly. Use pressure treated lumber and proper fasteners. Slope Calculations for End Joist: Make sure to account for the total drop needed for the slope. The top of this end joist will be higher than the top of the ledger by the amount that you calculated in the "Determine the Slope" section of Step 1. For example, with a 20 foot roof, you would make the top of the end joist higher than the ledger board by 5 inches. Attach the End Joist: Carefully attach the end joist to the posts or framing on which it sits. Make sure the joist is perfectly level in its short direction, and is strongly attached to the posts or framing below it. Install Additional Framing (if needed): If the roof is free-standing, you'll need to build perimeter framing on all sides.
Step 3: Installing the Rafters The rafters support the sheathing and roofing material. Determine Rafter Spacing: Common rafter spacing is 16 inches or 24 inches on center (OC). Closer spacing provides more support. Cut the Rafters: Cut the rafters to the correct length. If there's an overhang, include that length in your calculation. Install Rafters: Position the first rafter flush with the end joist. Secure it to the ledger board and the end joist with appropriate fasteners (nails or screws). Ensure it's plumb and square. Continue Installing Rafters: Install the remaining rafters, maintaining the chosen spacing. Use a measuring tape to ensure consistent spacing. Check each rafter for plumbness and proper alignment before securing it. Add Blocking (Optional): Install blocking between the rafters to add stability and prevent twisting. Blocking is particularly important for longer spans.
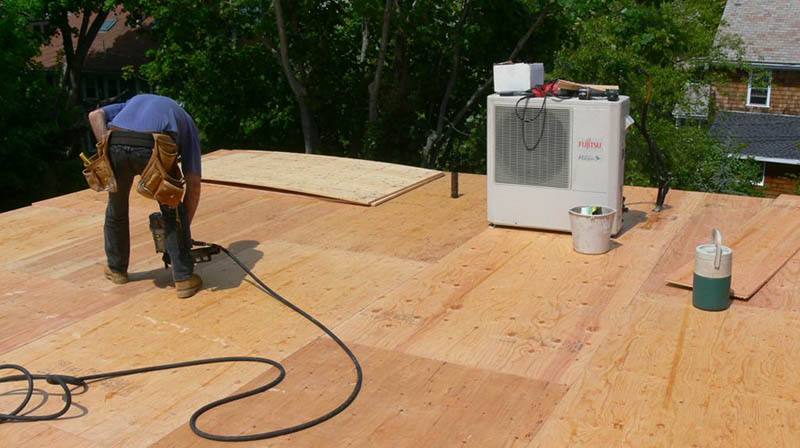
Step 4: Installing the Sheathing The sheathing provides a solid surface for the roofing material. Cut the Sheathing: Cut the plywood or OSB sheathing to size, ensuring it covers the rafters completely. Stagger the Joints: Stagger the joints between the sheathing panels to distribute the load and increase strength. Attach the Sheathing: Attach the sheathing to the rafters using nails or screws. Ensure the fasteners are driven flush with the surface. Check for Overhang: Make sure that the edge of the sheathing extending over your rafters is within your plan.
Step 5: Installing the Roofing Material This step is crucial for waterproofing the roof. Prepare the Surface: Clean the sheathing surface and ensure it's dry. Install Underlayment (if required): Some roofing materials require an underlayment. Follow the manufacturer's instructions. Install the Roofing Material: Install the chosen roofing material according to the manufacturer's instructions. This may involve rolling out EPDM rubber, applying TPO, or torching down modified bitumen. Pay close attention to sealing the seams properly. Add Flashing: Install flashing around any penetrations (vents, skylights, etc.) to prevent water intrusion.
Conclusion: Enjoy Your New Flat Roof Frame Building a flat roof frame requires careful planning, precise measurements, and attention to detail. By following these steps, you can create a durable and functional roof that will provide years of reliable protection. Remember to always prioritize safety and consult with a professional if you have any doubts or concerns about any part of the project.
How Do You Frame A Flat Roof
www.infoupdate.org Flat Roof Construction
 myrooff.com
 Framing Flat Roof Construction
 infoupdate.org

0 komentar:
Posting Komentar